Rustic Snowflake DIY
Happy D.I. Weilerts Wednesday! I think that's what we need to start calling Wednesdays. This week's D.I.Y. project was once again inspired by The Daily DIYer. Check out her Farmhouse Winter Decor video where I got the idea of creating a rustic snowflake out of blocks.
Let's just say that this D.I.Y. was a lot of trial and error, but I mention places where I messed up and hopefully you can avoid the same mistakes I made.
Here's what you need:
- Tumbling Tower Game/ Jenga blocks (I got mine from the Dollar Tree. See picture below.)
- Hot Glue
- Elephant/ Gray Chalk Paint
- White Chalk Paint
- Foam Paint brushes
 |
| I spy an Ella. I told you she photobombs all DIYs. |
 |
| Mimzy loves snoozing underneath me while I am working at my craft table. |
Step 1: Hot glue 6 blocks together in a straight line to make a stick. Do this for 3 sticks.
Step 2: Turn the stick vertically and hot glue after the first block. Hot glue two blocks diagonally. Do this on both ends for all the sticks.
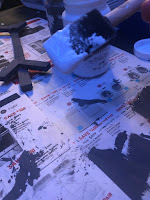
Step 3: Now it is time to paint! I laid some newspaper down and flipped the sticks over so the two diagonal blocks are on the bottom and holding the stick up. I painted the sticks gray. I used Waverly Chalk Paint: Elephant. Wait until the whole side is completely dried before flipping it. Learn from my mistake. I was too impatient and it ruined the project, because it dried to the newspaper. So, I had to start over again. (I know rookie mistake.) I also got a smaller paint brush to paint it gray in between the small parts.
Step 4: After I painted both sides of the sticks and they were dried. I then dry brushed with the white chalk paint on top of the gray.
To dry brush, you dip the paintbrush into your paint and wipe most of the paint off. I wiped mine on the newspaper. Then you very lightly (I tend to be pretty heavy handed on painting and use a lot of paint, so I needed to be mindful to do it lightly.) paint the white paint on top of the gray. I did both sides of the sticks for all three sticks.
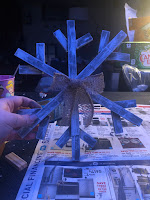
Step 5: Once the paint was dried (this time it dried very quickly), I then stacked the sticks how I wanted them in a snowflake shape. I then hot glued them in the center of each stick and put them together. Be very careful when glueing these down. Don't press too hard because the sticks and easily break.
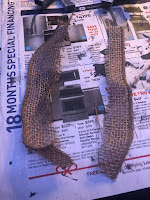
Step 6: I wanted to add something extra to my snowflake. So I added a burlap bow to the center of my snowflake.
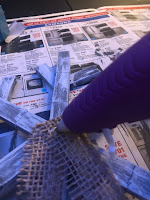
First I cut off some burlap and made it into two strips. I took one of the strips and tied it in a knot. I then took the second strip and fold it in half. I made it go out in diagonals like you would see on the bottom of the bow. I then hot glued the second strip down in the middle of the snowflake. Then, I hot glued the bow I made on top of the strip.
Step 7: Since the snowflake wouldn't stand on it's own and I didn't want to make it a hanging piece, I decided to make a stand for the snowflake with the remaining blocks. I ended up using 3 blocks to stabilize the snowflake. I tried to do it with one block but it kept falling, so I added another block to the front and back of the first block. In my pictures, you will see the trial and error process of the 1 block stand and adjusting in to a 3 blocks stand.
This is probably the best way to do it: First, you will need to paint 3 blocks gray. After it dries, dry brush the white onto of it. Then, hot glue the three blocks together. Then, hot glue the bottom of the snowflake to the center block of the stand.
How I did it: I painted 1 block gray and then once it was dried, I dry brushed it with the white paint. I then hot glued the bottom of snowflake to the block laying horizontally. It didn't stand well on it's own so I then painted 2 more blocks the same way and hot glued one to the front and to the back of the first piece. The first way is probably the easiest ways. Hey, we live and we learned!
Once the glue dries, place it in your home and enjoy!









Comments
Post a Comment